
Learning how to render lard on the stove from pork fat is quick and easy. By using the wet method to melt pork fat and strain out bits of meat and impurities, you can make homemade lard that’s pure white, neutral-flavored, and free of trans fat from hydrogenated oils. This lard is perfect for pie crusts, biscuits, tamales, wheat tortillas, or frying, so it’s extremely versatile. Although I bought fat from the butcher, you can use this recipe to render lard from fat on a ham shank, bacon grease, or even fat from another animal. If you want to learn how to make lard on the stove from pork fat the old-fashioned way, keep reading!
What Is Rendered Lard?
Rendered lard is semi-solid animal fat that has been separated from the meat and purified to remove impurities. If the beef, chicken, pork, or other fat is rendered properly, it has a pure white color, withstands high temperatures, and adds flakiness to baked goods, making it perfect for frying chicken, making pies, baking biscuits, and many other things common in southern kitchens.
Depending on the animal from which the fat comes, lard goes by different names. If cow fat is used, the lard is called tallow; if chicken or goose fat is used, it’s known as schmaltz. Since the rendered fat is known as lard when pork fat is used, it should be no surprise that pig fat is the most common.
Why Render Lard at Home?
While hard to find, lard is commercially available in many supermarkets. However, I highly recommend learning how to render lard on the stove at home for a number of reasons:
Real lard is hard to find – Most lard sold in grocery stores isn’t actually 100% pure lard; instead, it’s a combination of pork or beef lard with hydrogenated vegetable oil (shortening) to make it shelf-stable.
No trans fat – The addition of hydrogenated oil gives most storebought lard trans fats, chemically-altered fats that significantly increase our risk for heart disease. According to TexasRealFood.com, grocery store lard has bleaching agents, too. If you want old-fashioned lard, storebought isn’t what you want at all.
No waste – Although I’m going to teach you how to render lard from pork fat I bought from the butcher, I’ve also used this recipe to make lard from the fat on a baked ham shank. I don’t like to waste anything.
Preserving tradition – Making lard out of pork fat is a southern tradition that many people have lost. Why not try to keep the old fashioned recipe alive?
As you can see, learning how to make homemade lard is a good skill to have.
Why Render Lard On The Stove With Pork Fat?
As stated above, the most common type of lard is made from pork fat. This is because:
It’s traditional – Pork fat lard was very common in traditional southern cuisine because of the prevalence of pork in the culture. If you’re making southern style biscuits or old-fashioned fried chicken, it makes sense to use pork lard instead of beef tallow.
It’s easy to find – Like I said, I bought my pork fat from the butcher. Many small supermarkets sell packages of pork fat, but not beef or chicken fat, so if you want to make lard at home, going with pork fat will probably be the easiest in terms of sourcing the ingredients.
It has a neutral flavor – When done correctly and with the right type of fat (which I’ll address shortly), lard made from pork fat has a fairly neutral flavor that’s perfect for pie crust, biscuits, and other recipes.
Although I’ll be experimenting with other types of fat in the future–as well as other methods such as a crockpot–I think that showing how to render lard on the stove is a good place to start.
Wet Method vs Dry Method For Rendering Lard On The Stove
When rendering lard at home, there are two methods:
Wet Method for Rendering Lard
Bits of fat are boiling in a small amount of water. As the fat melts, the water evaporates, leaving liquid fat that can then be strained. Although stirring is required, you don’t have to stir as much as with the dry method. The resulting lard is white and neutral-flavored.
Dry Method for Making Lard
On the other hand, bits of fat are melted down with no other liquid. If done on the stove, this method involves more frequent stirring. The resulting fat is browner in color and has a more pronounced flavor.
In this recipe, I’m going to use the wet method because it requires less stirring and results in a purer product. However, if you use the dry method, let me know how it turns out.
What Type of Pork Fat to Use For Rendering Lard On The Stove?
Packages of pork fat at the supermarket are usually vaguely labeled as simply “pork fat.” However, there are 2 types of pork fat traditionally used for making lard:
Back Fat
Literally fat from the back of the pig. Since this is the largest source of fat on a pig, most pork lard is made from back fat. Although it is fairly neutral-flavored, it still has a hint of pork, so although it can be used in desserts, picky chefs prefer to use it in savory dishes like biscuits.
Leaf Fat
This fat is found mainly around the kidneys, but some is from around the loin as well (where bacon is cut). According to SoulyRested.com’s article Complete Guide to Pork Lard, leaf lard is highly coveted because its buttery soft texture, pure white color, and amazing neutral flavor make it ideal for pie crusts.
If you buy pork fat from the butcher or grocery store, my guess is that it’ll likely be back fat since that is the largest source of fat on a big. Even though back fat lard isn’t as pure as leaf lard, it’s still very, very good and most home cooks will find it acceptable.
How to Render Lard On The Stove (From Pork Fat) Ingredients
To make lard from pork fat on the stove top using the wet method, you only need 2 ingredients:
Pork Fat – I used a 1.7 lb package of pork fat from the butcher. For this recipe, I recommend using about 1.5 pounds, but a bit more or less should be fine.
Water – I planned on using 1/4 cup of water for the first round of rendering, so I kept an extra cup off to the side. The temperature of the water doesn’t matter – straight from the faucet is fine.
And you’ll also need a few tools:
Pot – For rendering lard on the stove, I recommend a heavy, thick-bottom pot.
Sharp Knife – Raw pork fat is actually fairly tough, so you need a sharp knife to cut through it.
Wooden Spoon – You’ll need to stir the pork fat as it melts down. Wood doesn’t conduct heat, so it’s a good option.
Strainer – To strain out the bits of meat, skin, and other impurities.
Paper Towels or Cheesecloth – I put paper towels in the strainer to catch the impurities.
Glass Bowl – You need a large glass bowl or other container to put under the strainer to catch the liquid fat.
Glass Jars – The melted fat will be hot, so I recommend pouring it into a glass jar. Depending on several factors, you may need up to 3 or 4, 16-oz glass jars.
As you can see, making lard on the stove is easy because you don’t need a lot of ingredients or tools.
Why Render Lard On Low Heat?
It’s best to render lard on low heat to get a high-quality final product. Lard rendered at a low temperature is whiter, has less odor, and a more neutral flavor, so you can use it in a variety of recipes. Although it’s time-consuming, making pork lard on the stove the right way is well worth it.
How To Render Lard On The Stove (From Pork Fat)
Learning how to render lard on the stove from pork fat is easy! All you have to do is follow a few steps:
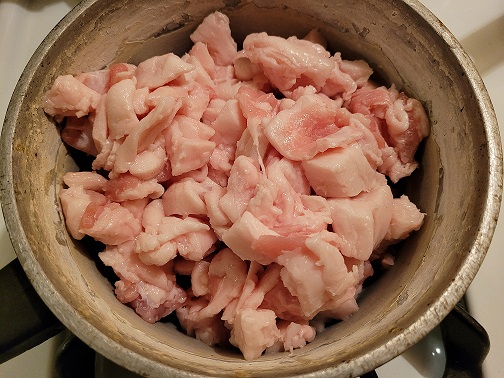
Cut the Pork Fat into 1-Inch Chunks
The first step of making lard is cutting up the pork fat into smaller, 1-inch pieces. This will help it to melt faster and more evenly. This might actually be the most difficult part of the recipe since pork fat is tougher than you’d expect.
The easiest way to cut up the pork fat is to take a piece of fat and make a series of cuts in one direction, then go back the other direction, making a crisscross of cuts. Don’t worry if the pieces aren’t the same size: as long as they are roughly equal, that’s fine.
Freeze the Fat Before Cutting?
Some people say it’s easier to cut up the fat if it’s frozen. I haven’t tried that (I just take it out of the refrigerator), but it makes sense. I’ve also heard of people asking the butcher to grind up the fat, so that might be an option, too.
Place the Fat into a Pot with Water
Once the pork fat is cut into chunks, put it into a pot and add water. If you start with about 1.5 pounds of pork fat, I would add 1/4 water, just enough to keep the fat from burning.
But honestly, a bit more or less is OK–just as long as you adjust the cooking time accordingly. The timestamps I give in this recipe assume 1/4 cup, so I recommend that the first time you make this recipe.
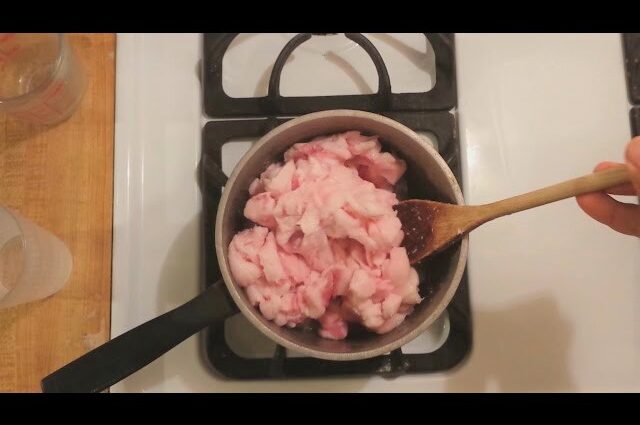
Cook and Stir on Low Heat for 30 Minutes
Then, turn the heat onto low (I used gasmark 2/6), stirring almost constantly. In the video I said I stirred constantly, but honestly, if you step away for a few seconds, that should be fine.
The goal here is to stir the chunks of pork fat so that they heat up and melt as evenly as possible. As you render the lard, you should notice these changes at about these times:
10 Minutes – Starting to turn a bit gray.
20 Minutes – The fat is now totally gray.
30 Minutes – The pieces of fat are turning brown, they’re starting to shrivel, and they’re making a frying sound. These little brown pieces that don’t melt down are called lardons, and they’re using in French cooking–some people consider them a delicacy!
When You See Lardons Forming, It’s Done
At 30-minute mark, the water will have boiled off, leaving only melted fat and lardons that are starting to brown. Thus, when you start to see lardons forming, you are done rendering the pork fat into lard.
Some cooking blogs say that the rendered pork fat is done when the lardons float. If you make a bigger batch, you might even see the lardons floating in the melted fat, but since my recipe makes a small batch, there probably won’t be enough liquid fat for your lardons to float.
Strain the Rendered Pork Fat
Next, put a strainer with a paper towel or cheesecloth over a large glass pour. Pour the melted fat off the lardons and into the strainer. By doing this, you’ll remove any small bits of meat, skin, or other impurities that were in the fat chunks, leaving only pure, melted pork fat in the glass bowl: this is your future lard.
Pour Into a Glass Jar and Store in the Refrigerator
After straining off the impurities, the last step in learning how to render lard on the stove is pouring the liquid fat into a clean, glass jar. Although the liquid fat is clear, it will solidify and turn white as it cools.
Once the melted fat is in the jar, put on the top and left it cool down a bit on the counter for an hour or two. It should then be cool enough to place into the refrigerator.
Clean the Pot to Render More Lard
With the first batch of this recipe, you should be able to fill 16 oz jar with liquid lard (I the video, I had about 20 oz from the first batch, so I needed 2 jars). If you want more, wipe down and rinse out the pot, return the lardons to the pot, add another 1/4 cup of water, and repeat the recipe.
Repeat the Lard Recipe
By repeating the recipe, you can extract more lard from the lardons. In the video I repeated the process 3 times, each time extracting less lard. As you can see in the video, the lard from the third batch wasn’t as pure white when it cooled, but it was still perfectly useable.
You may be able to get 2 if not 3 batches out of your pork fat, depending how much is skin and meat. If a batch results in barely any melted fat, there isn’t any more fat to render out of the lardons.
How To Store Lard
Although many old-fashioned, southern cooks would store a jar of lard on the counter, it’s better to place it in the refrigerator. I prefer glass because it won’t melt when you pour in the clarified fat, but another type of container may work, too.
How Long Does Homemade Pork Lard Last In The Refrigerator?
According to a KitchenSanity.com article, home-rendered lard will keep up to one year in the refrigerator. If kept in a sealed glass jar on the countertop, your homemade lard should last for 4-6 months.
Can You Freeze Homemade Lard?
Yes! Once it cools down and forms a white solid, scoop it out and place into plastic bags. You can freeze these bags for up to one year.
Can I Render Lard On High Heat To Make The Recipe Go Faster?
No. Don’t render lard on high heat. Even though it will go faster, you’re more likely to accidentally burn the fat, giving the lard an off color, odd odor, and stronger flavor. Although this lard is fine to use, it isn’t ideal, especially if you want neutral-flavored lard that can used in a variety of recipes.
Can I Use the Dry Method for Rending Lard from Pork Fat?
Yes! Although you don’t have to add water to the pot, I suggest doing so because it makes it more difficult to burn the lardons and ruin your soon-to-be lard’s neutral flavor. However, if you want to snack on crispy lardons after making lard, I suggest the dry method.
How Many Renderings of Lard Can I Get From One Package of Pork Fat?
By repeating the recipe, you can extract more lard from the lardons. In the video I repeated the process 3 times, each time extracting less lard. As you can see in the video, the lard from the third batch wasn’t as pure white when it cooled, but it was still perfectly useable.
In short, you should expect to get 2-3 renderings from about 1.5 pounds of raw pork fat.
How Much Lard Does This Recipe Make?
With 1.5 pounds of pork fat, you should be able to fill 1, 16-oz jar all the way to the top–and maybe a bit in a second jar–with 1 rendering. With 2 or 3 renderings, you’ll be able to fill a second jar about 1/2 full.
So, in short, I would say about 24 oz of high-quality lard from 1.5 pounds of pork fat.
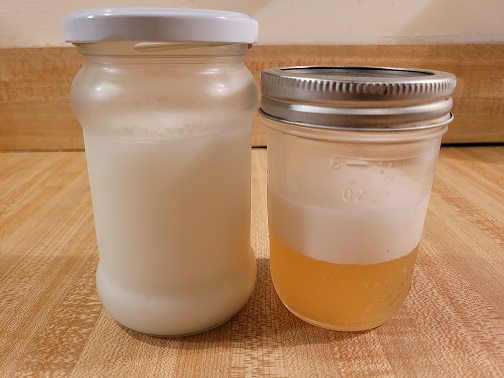
Help! There’s Liquid In The Jar of Lard. What Did I Do Wrong?
I made lard again recently with a little less than 1.5 pounds of lardons. The first batch made almost 1, 16-oz jar, and the second batch made about half that. Although the lard from both batches was white, the second batch had solidified lard on top of brown liquid.
This brown liquid meant that I didn’t boil out all the water from the lard during the second batch (I was in a hurry). If this happens to you, simply scoop out the white lard and place in another jar.
Can I Use Other Types of Pork Fat To Render Lard On The Stove?
Yes! Although I didn’t record a video, I once used fat from a ham with pineapple and cherries to make lard. I followed the exact same procedure: cut the fat into chunks, cooked it on low, then strained it.
The resulting lard was very good. It definitely had a smoky taste, so I wouldn’t recommend it for peach pie or blackberry cobbler crust, but for frying chicken or adding flavor to beans, it would definitely work.
Can I Make Lard From Pork Fat In The Crockpot?
Yes! Although I’ve never done it, there are many recipes on the Internet showing how to render lard in a crockpot. I will have to try that someday.
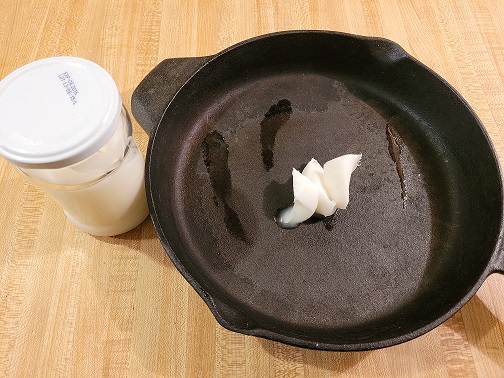
How Can I Use Pork Lard Made On The Stove?
Homemade pork lard is a very versatile ingredient. It can be used in a variety of recipes, such as:
Old-Fashioned Cornbread: Instead of putting oil in the cast iron skillet, a bit of pork lard will give your cornbread a great, old-fashioned southern taste that you’ll never forget.
Pie Crust – For a super flaky and delicious crust, use a combination of lard and butter.
Biscuits – Lard is a classic ingredient in southern biscuits.
Tortillas – For homemade white flour tortillas, nothing beats homemade lard.
A Chef’s Review
Overall, I was very happy with how my homemade pork lard on the stove top turned out. Its pure white color, fairly neutral flavor, and semi-solid texture as expected meant that I rendered the fat into lard properly. Although cutting the fat into chunks is the hardest part, it’s worth the effort to have old-fashioned lard without hydrogenated oils and the resulting trans fat.
If you want you’ve never made lard before, I highly suggest this recipe. Once you see how it tastes in a skillet cornbread or pie crust recipe, you’ll never go back to the storebought kind with hydrogenated oils and bleaching chemicals (which aren’t very good for you at all).
Possible Changes to My How to Render Lard on the Stove Recipe
Although I think that my method for making lard on the stove top was a success, possible changes include:
Dry Method – I’d like to dry the dry rendering method one day.
Crockpot – Using a crockpot would take longer, but it would eliminate the need to stand over the pot and stir so much.
Lard Recipe Variations
Now that my pork lard was successful, I want to try making:
Beef Tallow – I think beef-based lard would be great for making Argentinian empanadas.
Chicken Schmaltz – I wonder if I could make lard from the skin I peel off of chicken leg quarters?
Duck Fat – I hear that duck fat fries are awesome, haha
Other Stove Top Recipes
If you prefer to cook the old-fashioned way, here are some more stove top recipes you might enjoy:
How to Cook Navy Beans On The Stove
Pinto Beans and Ham on the Stove Top
Frozen Lima Beans and Ham on the Stove Top
How To Make Lard On the Stove From Pork Fat Directions
How to Render Lard On The Stove (From Pork Fat)

Ingredients
- 1.5 pounds of pork fat
- 1/4 water (plus more for additional renderings)
Instructions
- Cut the raw pork fat into chunks. I recommend taking a large piece and then making linear cuts first vertically and then horizontally.
- Once the pork fat is cut into small pieces, put it in a pot and add 1/4 cup of water. The temperature of the water doesn’t matter.
- Heat on low (I used gasmark 2/6) and stir almost constantly so that all the chunks of pork fat are cooked evenly.
- After 30 minutes, the water will have evaporated, leaving melted pork fat and light brown lardons. Pour off the melted pork fat and run it through a strainer and paper towel or cheese cloth.
- Pour the melted fat into a glass jar and close with a lid. Let the jar cool for 1 to 2 hours before storing in the refrigerator.
- If desired, clean out the pot, return the lardons to the pot, add 1/4 cup water, and repeat the recipe. Depending on how much meat and skin was attached to your pork fat, you may be able to get 2-3 renderings out of 1.5 pounds of fat.
YouTube Video:
Be sure to watch my YouTube video tutorial: